For those of you who keep up with the latest popular games, you may have heard of a simple word game called Wordle. Developed by programmer Josh Wardle as a game that was initially intended as a pastime for his girlfriend, it is now a hit game that intrigues many people with its premise: figuring out what the 5-letter word of the day is by guessing the word in six or fewer moves. What is perhaps most interesting about the game is not simply the gameplay itself but the timing and social aspects of it: you can only play one puzzle a day, and that same puzzle is presented to all players within a 24-hour window. Once you’ve solved the puzzle, you can share your results with others via a clever set of colored squares that shows how many moves you solved the puzzle in, as well as which letters were in the word and possibly in the correct places in every guessed word. The nice part: the colored squares do not give away the actual letters in the guess or the solution, so players can brag about how well they did (the fewer the moves, the better) without spoiling the puzzle for others. It is worth noting that this game has been so popular that The New York Times purchased it for over $1 million!
I quickly became addicted to the game and found myself wanting to play it more than once a day. Always searching for fun puzzles to recreate, I decided to write a Wordle clone. In true Roz fashion, I’ll walk you through how I approached the game design, focusing more on how I broke the game down into components and state instead of focusing on the code and styling itself (although you can view the full code in my GitHub repo). This post is for those who are new to game development and would like a beginner’s walkthrough of how to approach game design. I’ll be creating the app in React, so although a basic understanding of React and its lingo is helpful, the principles that I apply here can be ported to a programming language of your choosing.
For those who’d like to play my version of the game right away, here is the full demo. Let’s get started!
Game Play
First up, the rules! Here’s a screenshot of the original game rules:
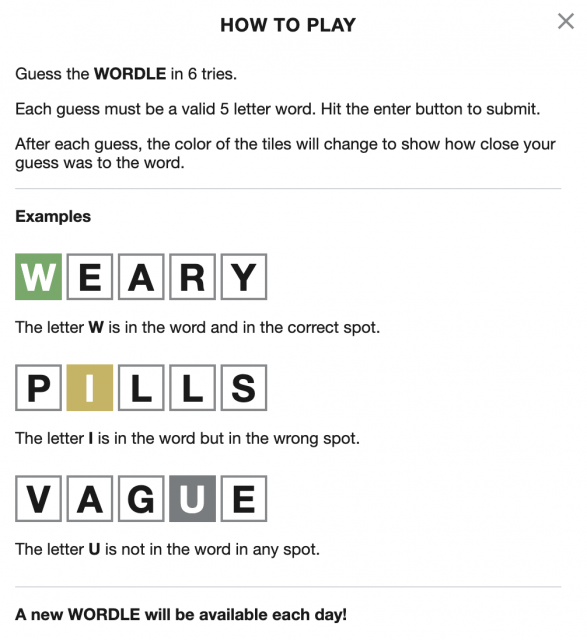
Wordle Game Instructions
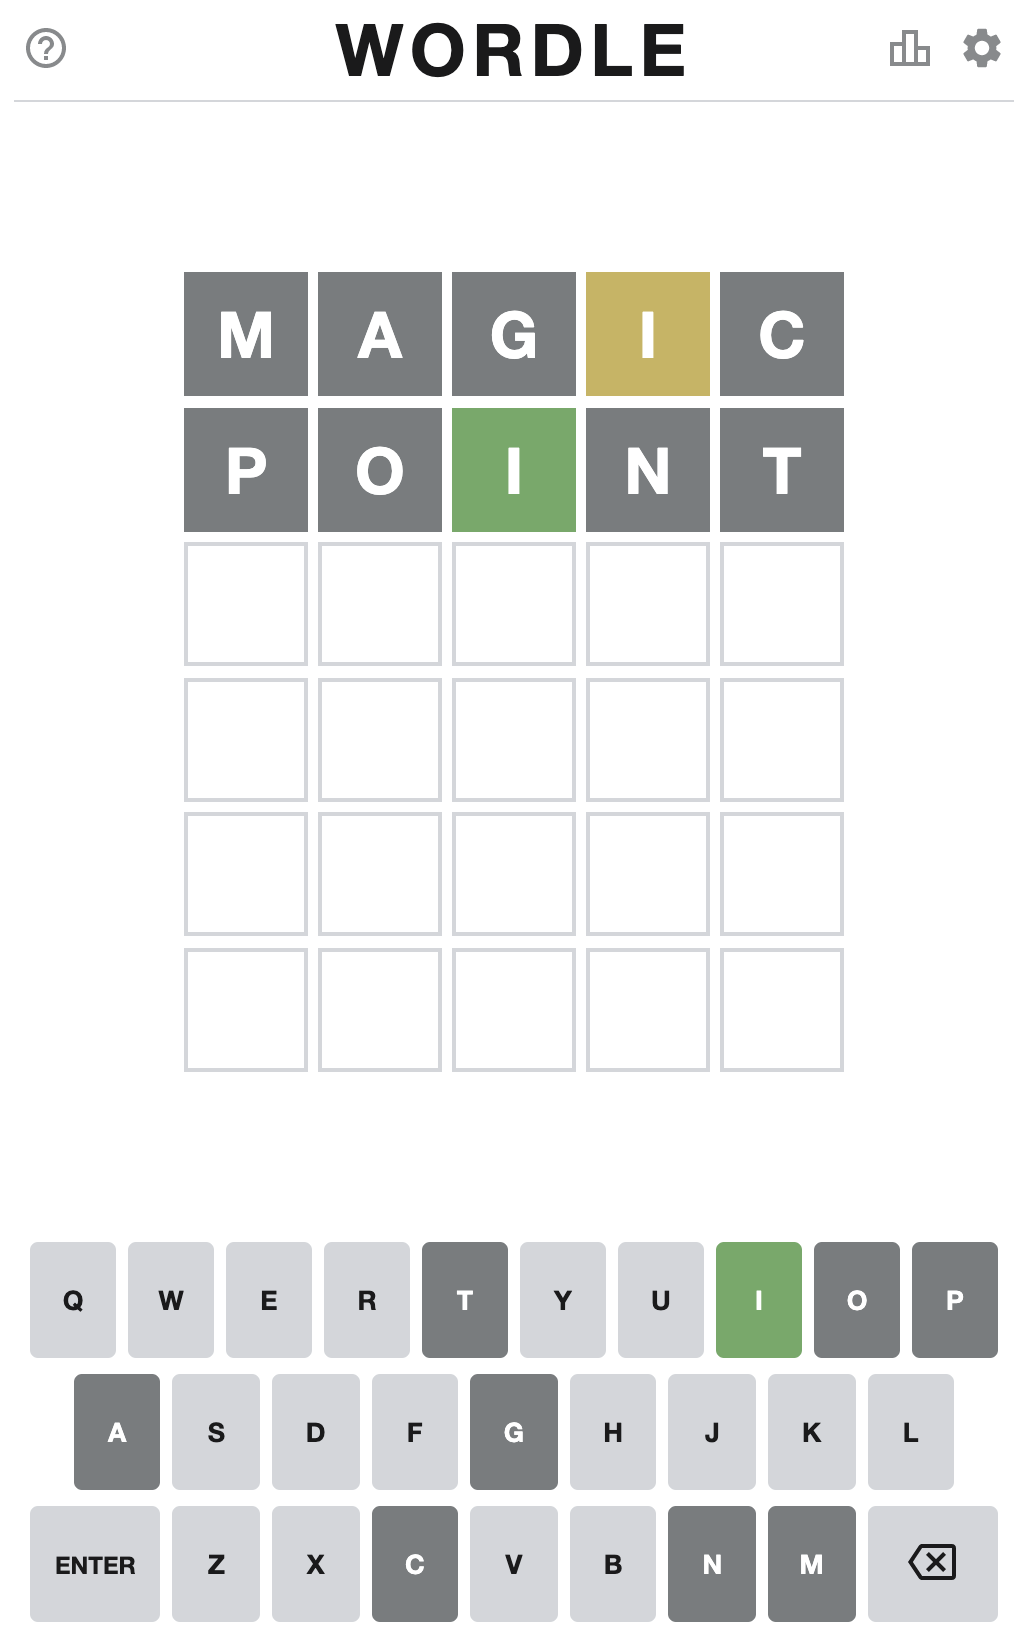
And to get a feel for the gameplay, here are some screenshots of my attempt at puzzle #212:
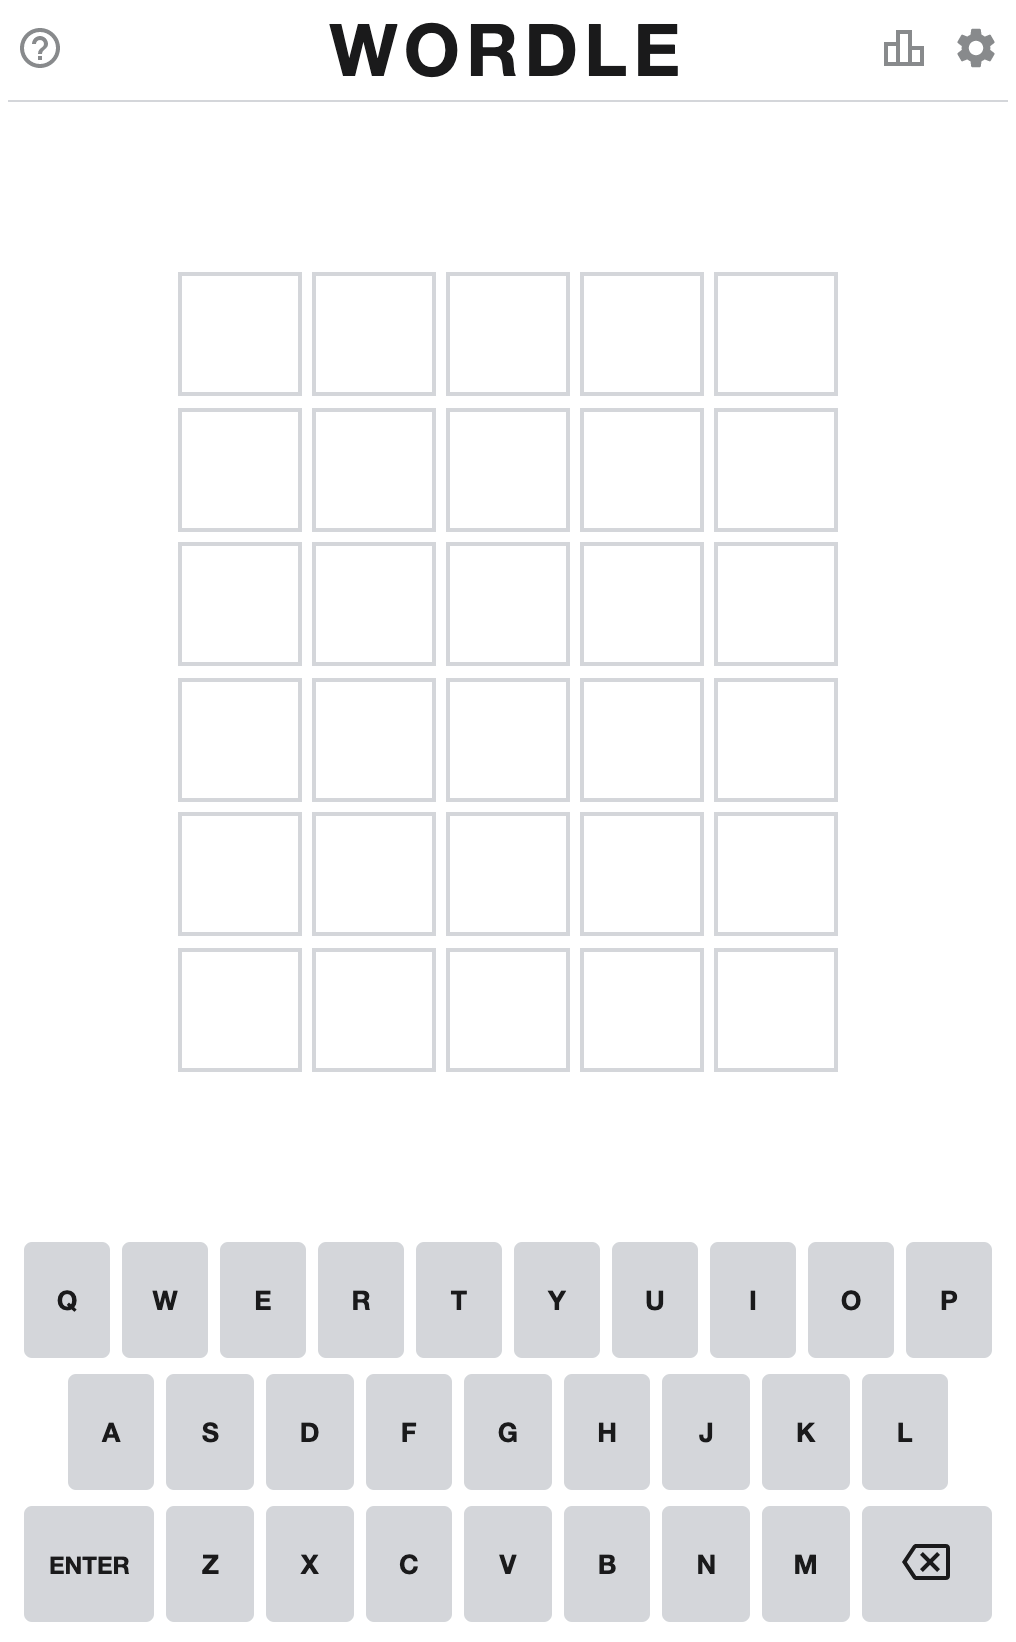
Starting game state
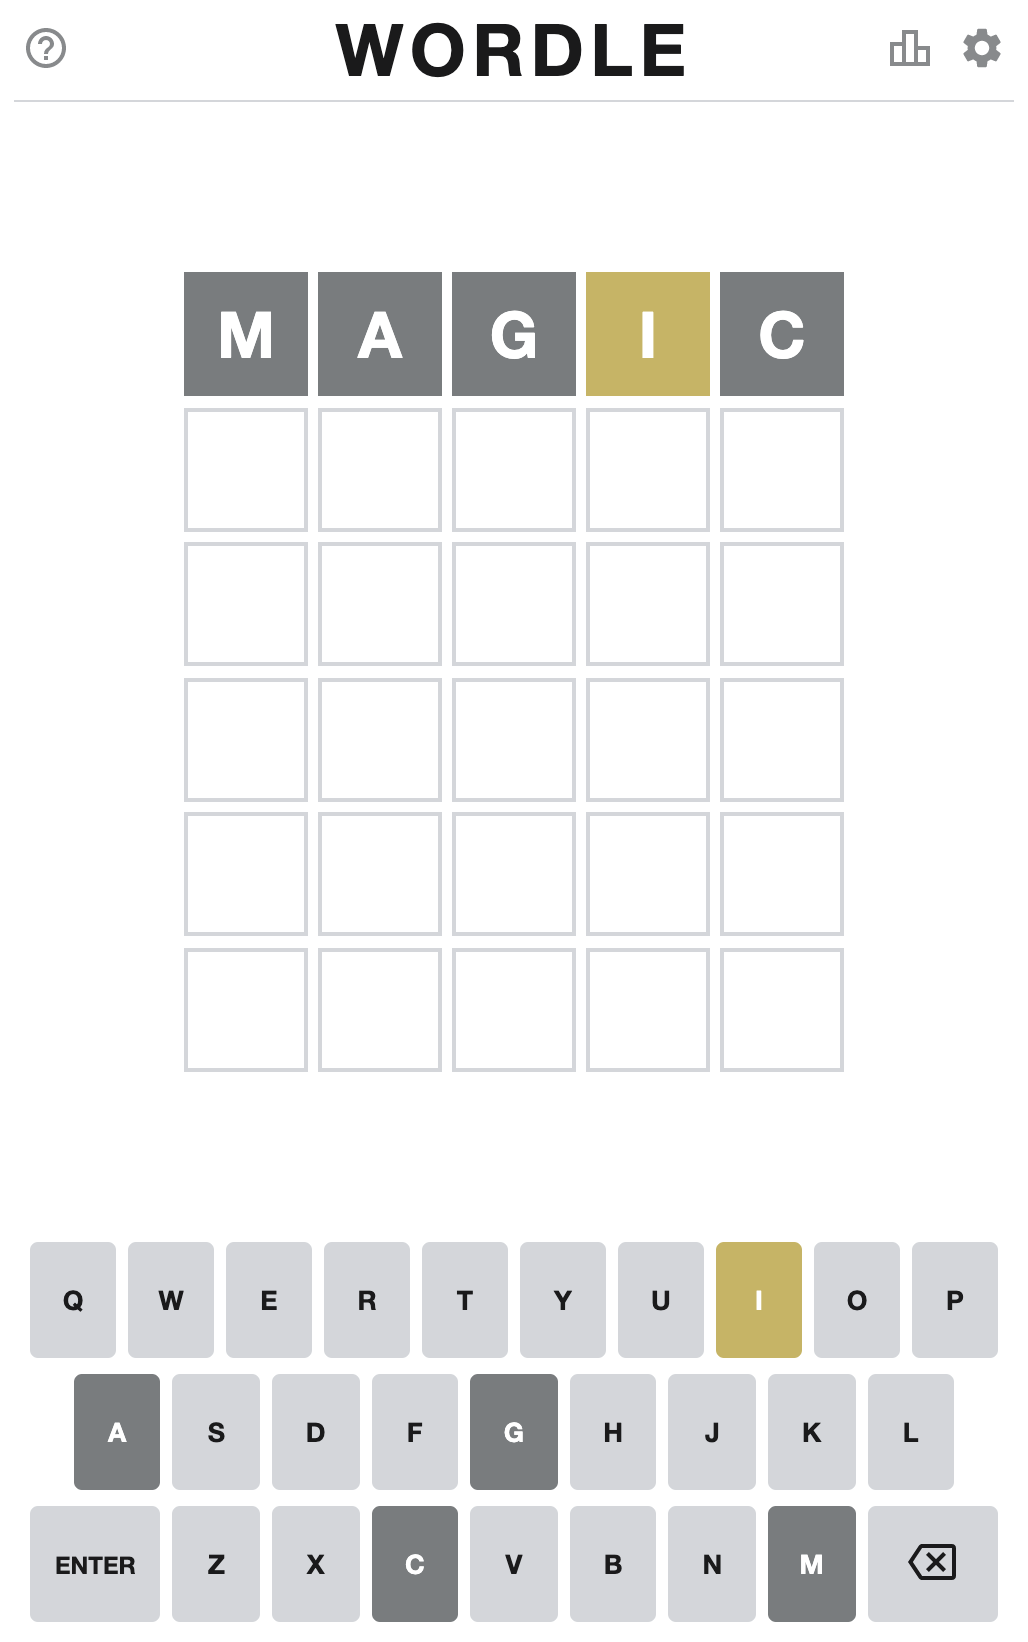
The first guess ‘magic’ has one correct letter in the wrong spot
The second guess has the ‘i’ in the correct spot.
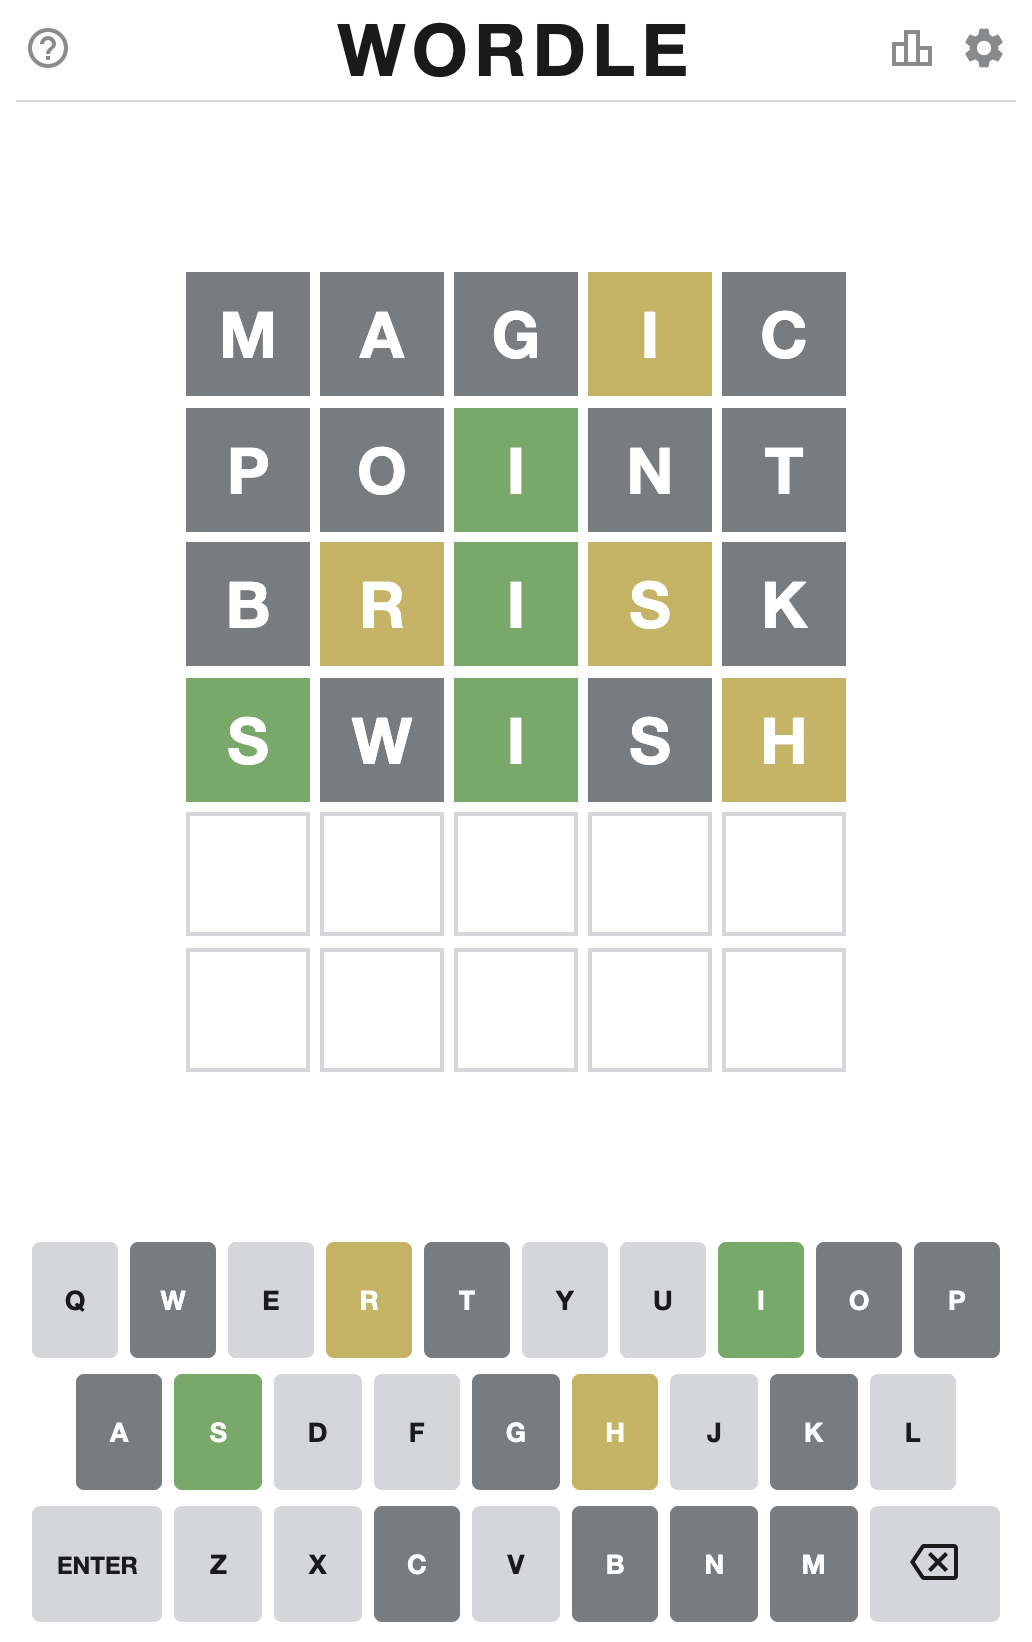
A few more guesses show progress
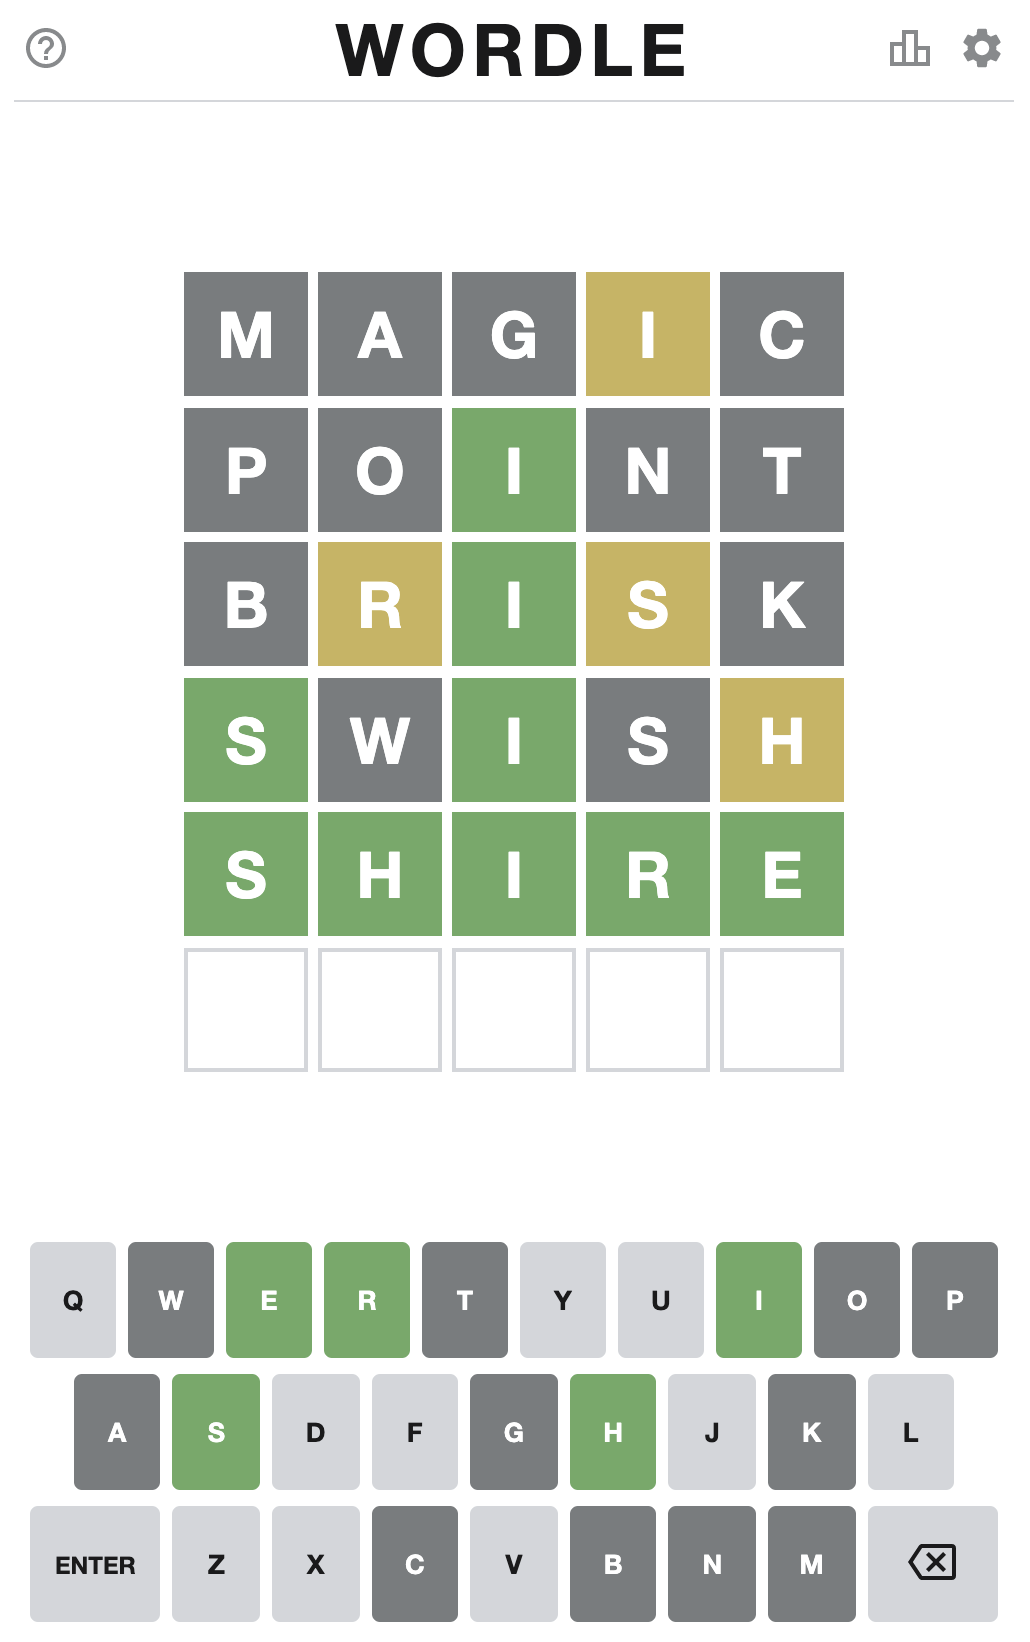
Puzzle solved!
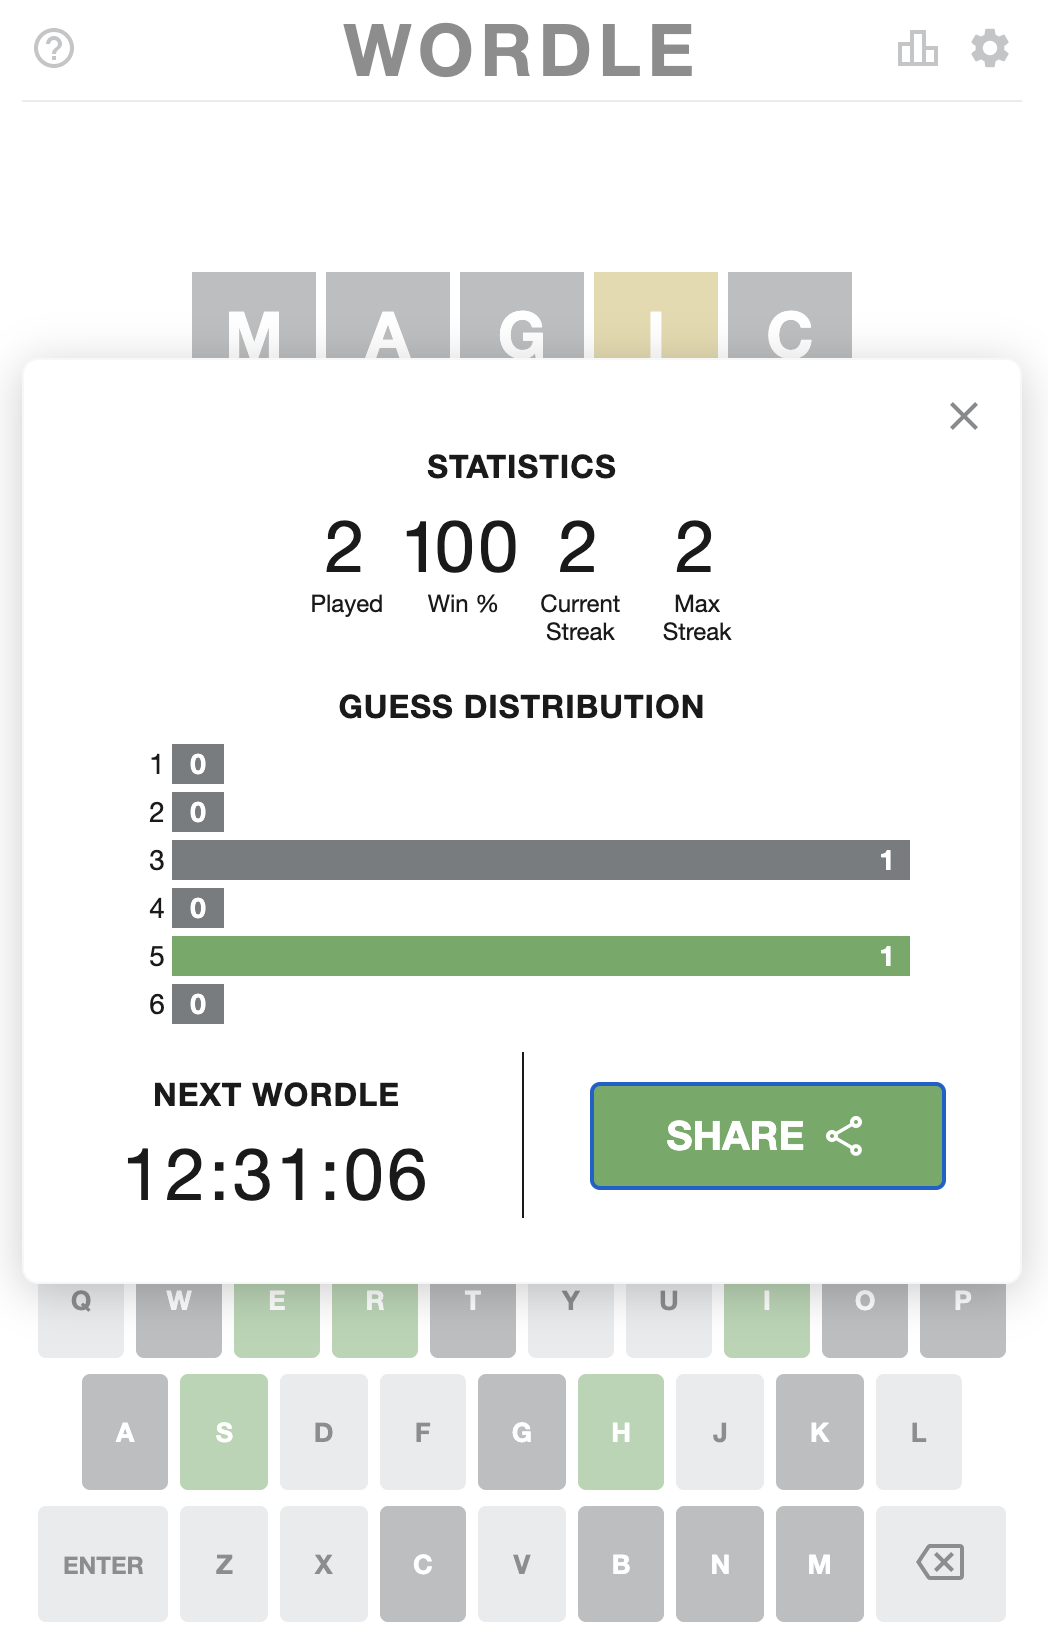
Status, countdown, and share button
⬜⬜⬜🟨⬜
⬜⬜🟩⬜⬜
⬜🟨🟩🟨⬜
🟩⬜🟩⬜🟨
🟩🟩🟩🟩🟩
Notice how the squares simply show me which letters are in the word (yellow) and in the correct space (green); they convey nothing about the actual solution. The title has the puzzle number and the ‘5/6’ conveys that I solved the puzzle in five out of six moves.
There are a few interesting aspects to think about here. First, there’s the game board and gameplay. Then there’s the keyboard presentation, which allows for some helpful highlighting of previously guessed letters). Lastly, there’s the sharing pattern. Let’s tackle these in order.
The Game Board
The board has six rows and five columns, where the rows represent word guesses and each cell is a single letter. Let’s think about the states that each cell on this board can be in at any given time. By default, cells are empty. When a user types a letter, we could say that a cell is filled. With this simplification, we have two states. Given this, we could easily model our board as a 2-dimensional array of strings that are empty upon initialization and updated with the entered letters as the game progresses. Such a grid may look like this if we model my first two guesses of puzzle #212:
[
  ['m', 'a', 'g', 'i', 'c'],
  ['p', 'o', 'i', 'n', 't'],
  ['', '', '', '', ''],
  ['', '', '', '', ''],
  ['', '', '', '', ''],
  ['', '', '', '', ''],
]
Note that uppercase or lowercase letters are fine, as long as your code stores what the user enters in a consistent way.
This model of our grid works: it tells us whether a letter has been entered or not, but it does not tell us whether a row has been submitted as a guess; consequently, it does not tell us whether a particular letter is in the solution or in the right place in the solution. This can be remedied, however, by storing additional game state (for example, having a row component that keeps track of each guess and having a cell component that stores the value and state of each cell on the board).
As with almost anything in programming, there are other approaches that we could take, but I am a fan of a simple board representation with other game state stored elsewhere. A benefit of this approach is that the board remains pure without the clutter of other game states; a flip side of this is that the game state is managed across several entities which can make tracking and upkeep more difficult. In this walkthrough, I am going to stick with the simple grid state and manage the other details in additional state objects and components. This grid will live in my main game component that controls gameplay.
Let us now flesh out our game state a bit more. So far, we have a way to model two states for a cell on the board: an empty cell and a cell with a letter in it. However, there is more to think about than just these two states. Consider the following cell states:
- Empty: no letter entered
- Filled: submitted or not submitted
- Not submitted: When a user types a letter but hasn’t committed the word in that row (i.e. hasn’t entered the full 5 letters and pressed ‘enter’ to get feedback about that guess), we could say that the cell is filled but not yet submitted.
- Submitted: When a user presses ‘enter’ on a valid 5-letter word, a cell then has an additional state layered on top: whether that letter is not in the word, in the word but in the wrong place, or in the word and in the correct place:
- Letter not in word
- Letter in word
- In the wrong place
- In the correct place
These additional states for a cell will be important when we want to give players visual feedback about each guess. From this perspective, the grid can be thought of not only in terms of the individual cells but also the rows that represent each guess (and thus information about how the letters in a guess relate to the solution). So let’s think about how we can represent a row.
The grid is an array of rows, where each row is modeled as an array of strings (which are empty by default):
['', '', '', '', '']
In addition to this array, the row component needs a way to check the player’s guess against the solution. Thus the solution can be passed as a prop to the row component so the row can determine which status a letter in the array is in (and this status is ultimately passed on to a cell component that will color the cells in the UI depending on the state). It is important for the row to also have a sense of whether the player has entered that row as a guess (versus typing in the letters but not pressing enter); otherwise, the player should be given no feedback about the letters typed in. This gives us the following props to pass to the component:
- The string array that represents a player’s word guess
- The puzzle’s solution
- Whether the row has been submitted as a guess
- whether the row is active (user is currently working on a guess) and if so, which cell index is the user currently working on
Note that checking whether the row is active is an optimization that I added that the original game doesn’t have; I show the active cell differently from the default cell state because I believe that it is nice to know which cell you’re currently filling in as a way to make the game board feel alive and to show progress.
The cell component is pretty straightforward: it is passed a string (either a letter or the empty string to denote an empty cell) and a status that determines how to present the cell in the UI.
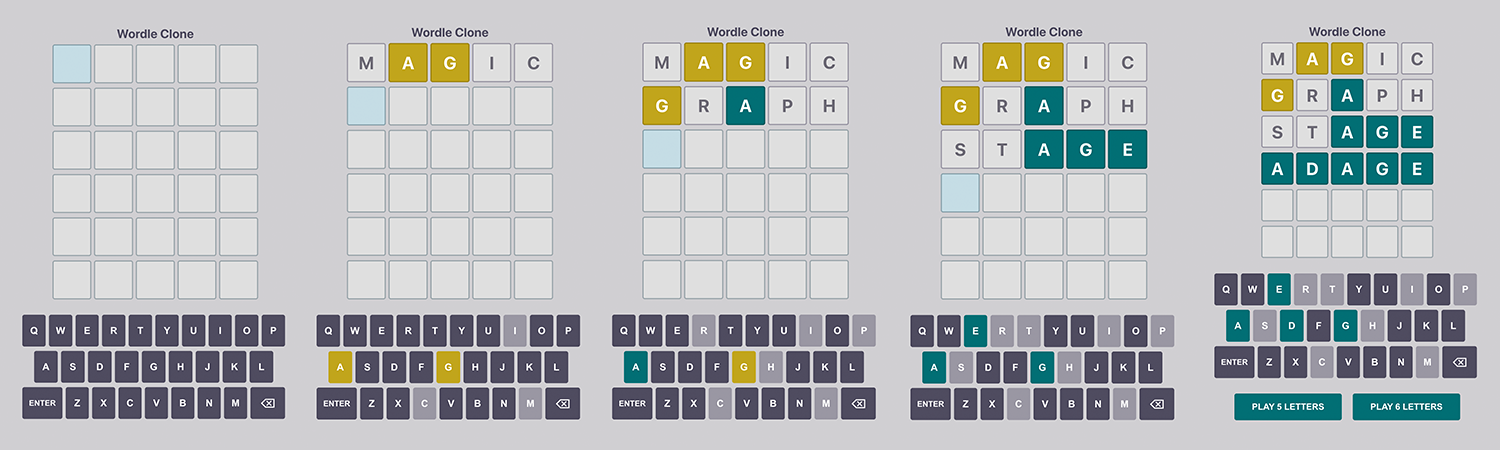
Here’s a screenshot of what my styled board looks like with the different cell styles shown (the active cell has the light blue background and entered but not submitted letters are a dark blue color):

The styled game board
So far, we’ve taken care of some game state and the grid that lives in the main game component, the row component, and the cell component. We’ve successfully found a way to model the entire board. Now we need to think about the gameplay and what additional things we need to store in the game component.
Gameplay
Now that we have the presentation of the board out of the way, let’s think about what else we need in order to play the game. First up, we need a solution! A solution is simply a random 5-letter word. In order to create my dictionary of 5-letter words, I installed the an-array-of-english-words npm package. It is easy to install and use. For example, I can generate an array of 5-letter words from their entire dictionary of words with the following:
var words = require('an-array-of-english-words')
console.log(words.filter(d => /^.{5}$/.test(d)))
I simply saved the resulting array as a constant in my code so I can access it easily. Note, however, that I actually ended up with two arrays in my game: this large dictionary, which allows me to validate that users enter a valid word for each guess (otherwise, the puzzles would be much easier to solve; think about why); and a smaller array that has only common 5-letter words. This smaller array is important because I would hate to frustrate users who get stumped by an obscure word like ‘calyx’ (it turns out that the original game developer took this approach of using a smaller common word dictionary as well). This, unfortunately, takes a good amount of time to do; pruning an array of thousands of words is no small feat. Sadly for me, I realized that the common words are actually available in the source code for the original game, so I did all that pruning for nothing!
Let’s talk about the game state. We already have our game grid. We know we need a solution for each generated game (e.g. ‘space’ being the word that players need to guess in a given round). To generate our solution, we simply take a randomly selected word from our array of common words. I also keep track of the number of rows and columns in the grid, the current row and column that the user is on, and whether the user is still working toward a solution or has won or lost the game. Lastly, I keep track of the letters that the user has guessed so far (across all guesses) so that the keyboard component (discussed next) can know which letters to show progress for (e.g. whether a letter was ever guessed in the correct place) versus which letters to show as the default letter style.
To start things off, the user first enters a guess. This can be done by typing letters on the keyboard or by clicking buttons on a UI keyboard. The game tracks whether the user enters a letter, presses the backspace key to remove a letter, or presses enter to submit a guess. Then the game logic checks the guess against the solution; if correct, the player wins and the round is over. If incorrect, any hints about the solution are provided and the user gets another guess. If the user runs out of the number of allotted guesses, the round ends.
Displaying hints for the submitted guesses in the game grid is pretty straightforward once you get some design decisions out of the way. We know that we want to color a cell yellow if that letter in the guess is in the word but in the wrong place, and it should be green if the letter is in the right place in the solution. One thing to consider is whether to show a guessed letter as yellow no matter how many times that letter appears in the solution. Consider the following example, which has the solution ‘cheek’:
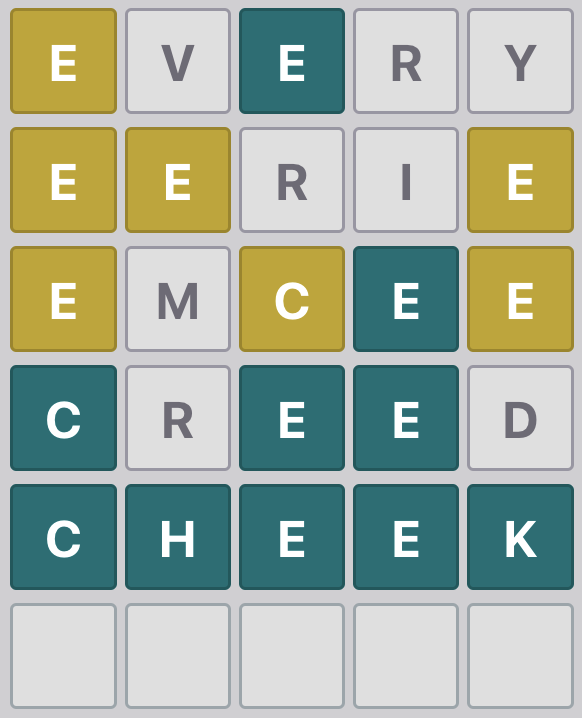
An example with multiple E’s
‘Cheek’ has two E’s in it. If the player guesses a word that also has 2 E’s, like ‘every’ shown above, then it’s easy to apply the rules: highlight each E as yellow or green as appropriate. However, if we guess a word that has more than 2 E’s (like ‘eerie’), then we could choose to divulge the number of E’s in the solution by only highlighting two of the three E’s. It’s a mostly subjective choice when it comes to how to handle this. I opted to not give away the number of times a letter appears in the word in situations like this and instead chose to highlight all repeating letters in a guess as yellow or green as appropriate if that letter is in the solution. Thus for guesses ‘eerie’ and ’emcee’, I highlight all three E’s in their appropriate colors. I’m not actually sure how the official game handles this, but in my version, this is what made the most sense so that not too much information is given away.
Now that we’ve covered how to highlight the game board, let’s look at how to highlight the UI keyboard that appears at the bottom.
The UI Keyboard
Displaying a keyboard with letters, a backspace button, and an enter button is pretty straightforward. Things get interesting when highlighting the letters to match the yellow and green state of the cells on the game board, as well as adding a way to show which letters are not in the solution. In order to do this keyboard highlighting, I added more state to the game component to track which letters have been guessed. The key goal for the keyboard is to show a letter in green if the player guessed that letter in the correct position in any of her guesses and to show that key as yellow if it is in the solution and guessed in at least one of the guesses. To do this, the keyboard component needs to be passed a prop that stores an array of all submitted guesses. The component also takes the solution so it can check each letter against the answer. I also pass in the set of guessed letters to make it simple to check whether a letter should be left in its default state or a hint state. Lastly, the component has a function that is called in the game component to handle actions whenever the user clicks on one of the UI keyboard buttons (actual computer keyboard interactions are also handled in the game component).
For the highlighting algorithm, I consider each letter on the keyboard one at a time. If that letter hasn’t been guessed yet, I leave the key as the default color on the keyboard. If the letter has been guessed, I loop through each submitted guess word and then through each letter in that guess to see if that letter was guessed in the correct position at any point; if so, that letter appears as green on the keyboard. Otherwise, if the letter was guessed and is in the winning word, I color that key yellow. This basically means that I take the best letter position for each letter in each guess and use that to color the keys. For guessed letters that aren’t in the solution, I fade those keys out so users aren’t tempted to guess those letters again.
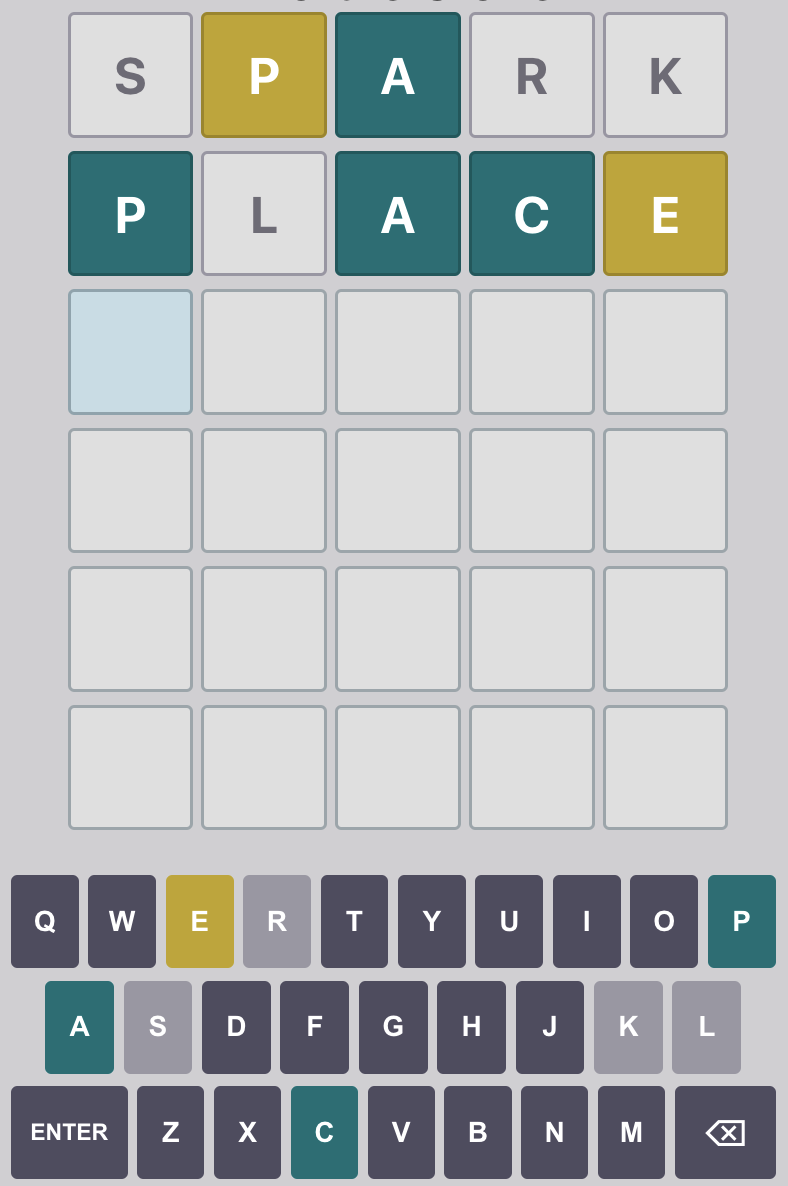
Here is an example of how the keyboard changes with each guess:

‘P’ is in the solution, ‘A’ is in the correct place in the solution, and ‘S’, ‘R’, and ‘K’ are not in the solution.
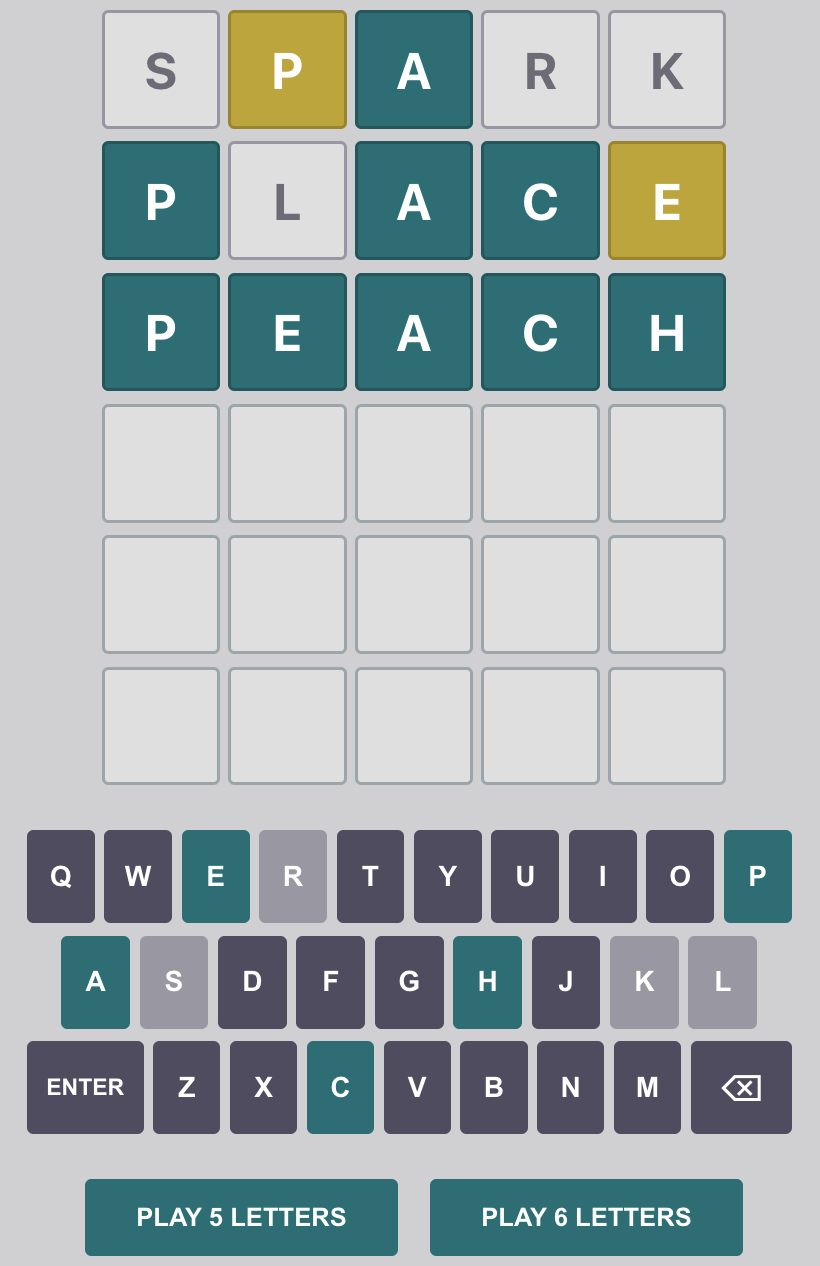
Further keyboard updates; ‘P’ is now correctly positioned and some additional solution letters have been discovered.
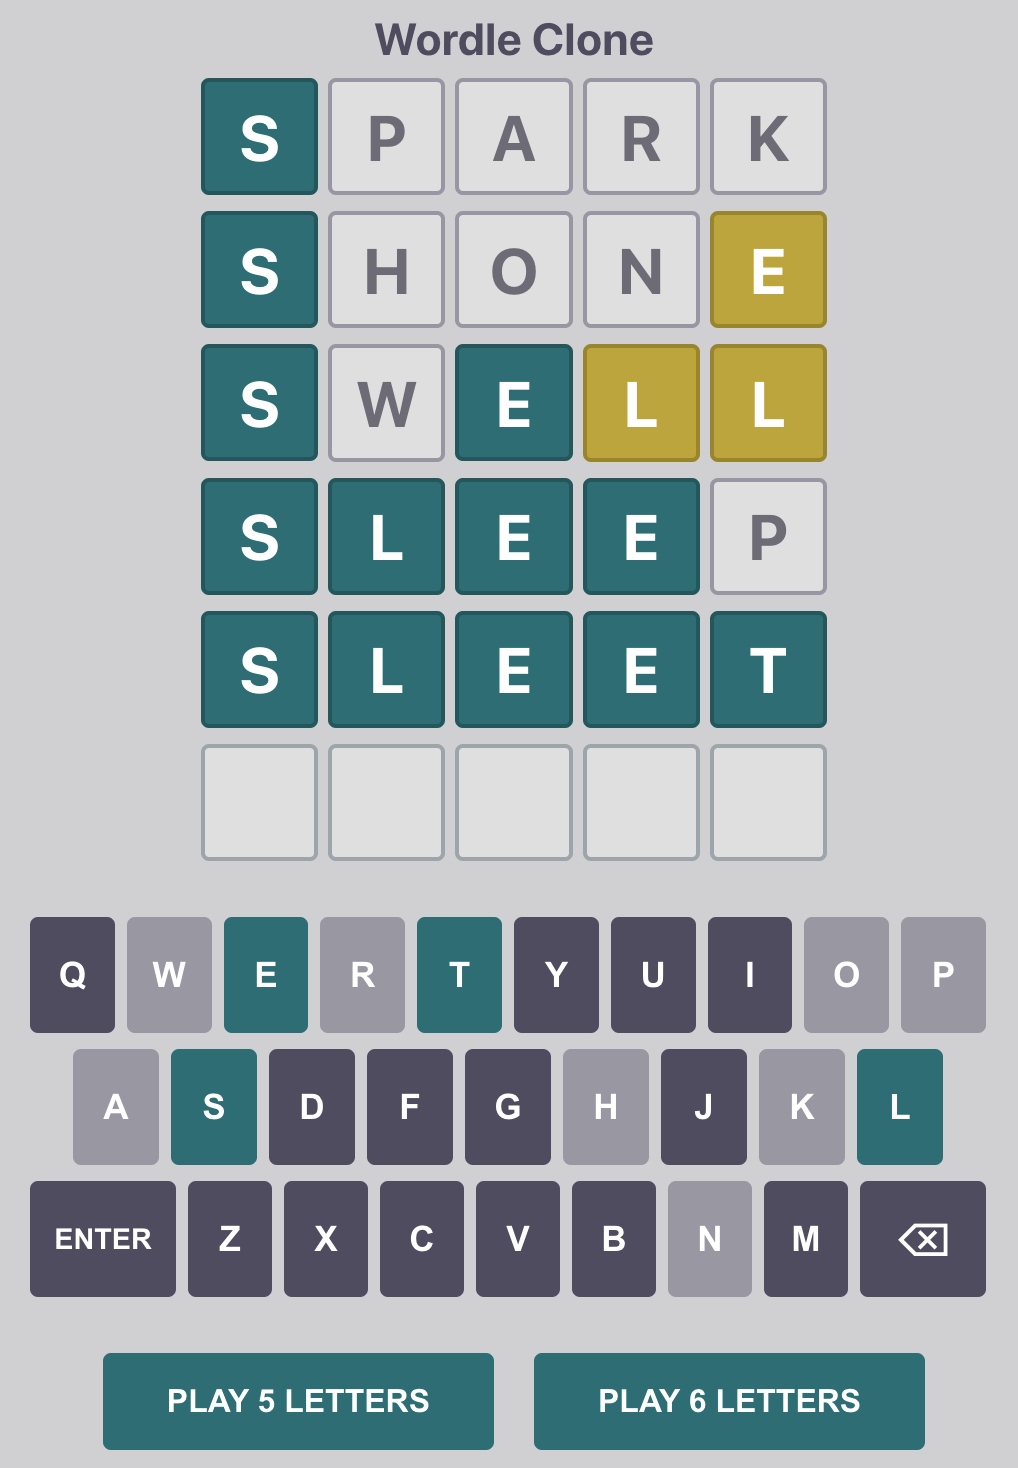
Solution found!
Sharing Your Results
To share the won game results with others, I used a helper function that determines the appropriate color for each guessed letter. I then map that to a Unicode character for each cell, with a black box for letters that aren’t in the solution and yellow and green boxes for the other appropriate guess types. Below is an example of what this looks like. Note that instead of the daily puzzle number that is included in the original version of the game, my version includes a link to the specific puzzle so it can be shared with others for enjoyment and competition at any time (note that the link includes a hash of the solution to prevent the answer from being divulged).
I allow users to copy this result for sharing with others. Here is an example:
A 5-guess solution
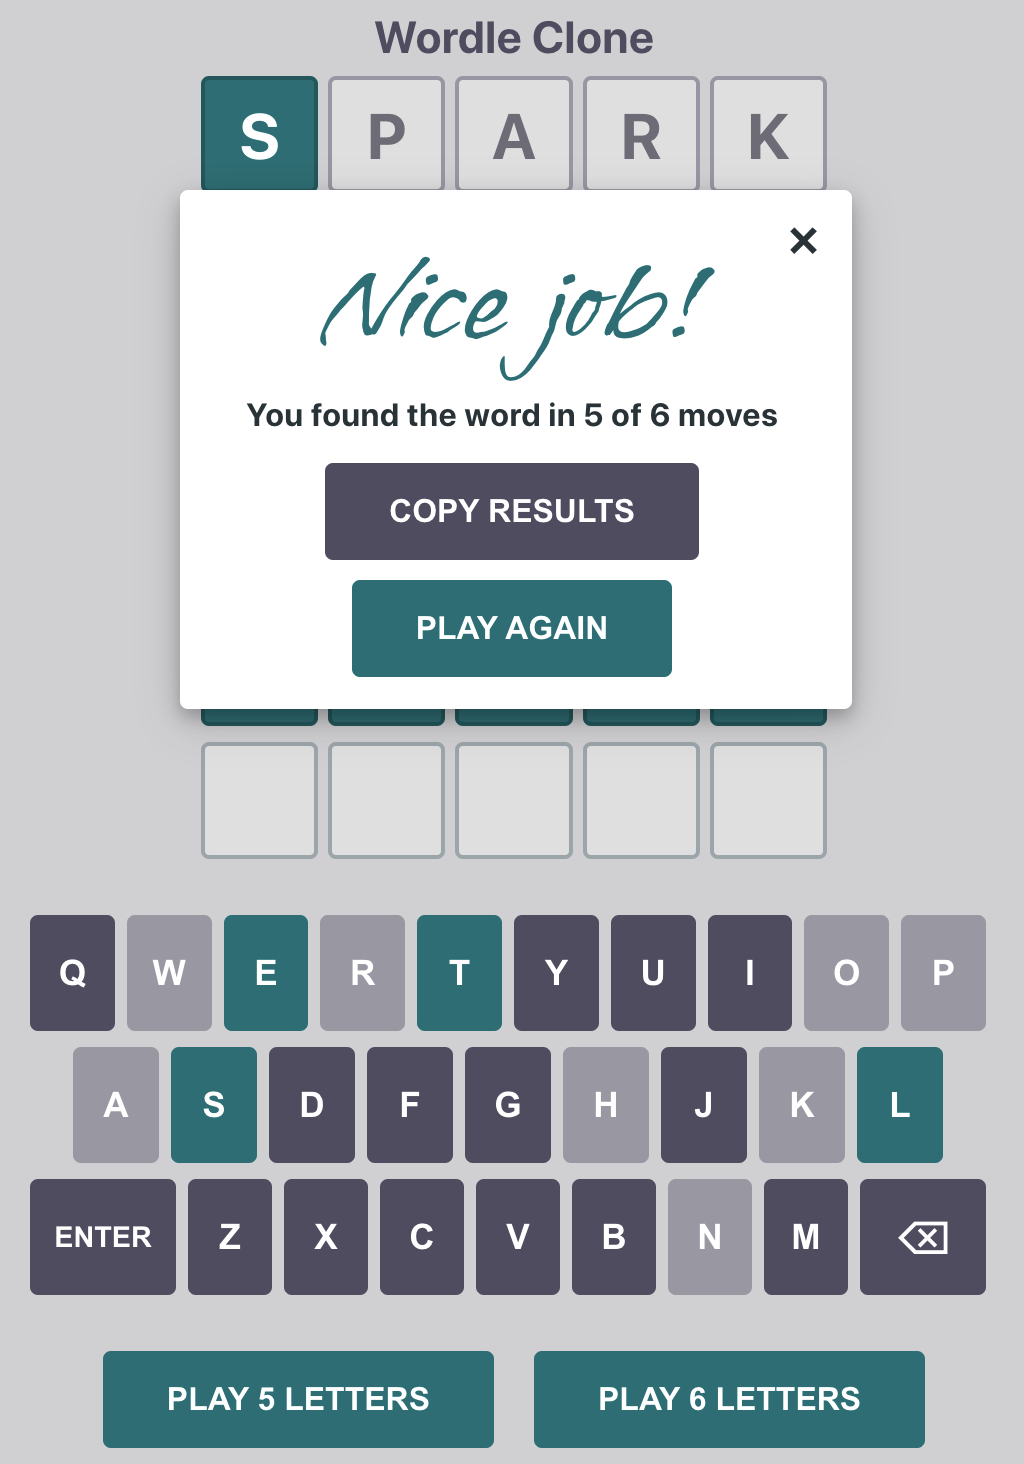
The success modal
Conclusion
That pretty much covers all the major topics of my implementation of the game! I decided to not work on storing statistics that show players their winning streaks and other data, but that’s a nice feature to add to the game for the adventurous. I did add some other features, however. I added routing to allow the player to get a unique hash in the URL for each possible solution word so that players can share the same puzzle with friends as shown earlier. To accomplish this, I used the Hashids JavaScript library. I also added support to allow players to play new rounds after winning or losing a round. Lastly, I decided to hash the solution so that it isn’t visible in clear text to anyone clever enough to investigate the React game state in the console. It turns out that the original game’s solution can be found by looking at the local storage for the application via the JS console (see example below); this is pretty disappointing in my opinion and is easily fixed by hashing the solution in a way that allows the word to be decoded behind the scenes. This way, players who have the hash cannot decode it without knowing the salt that was used to hash the solution.
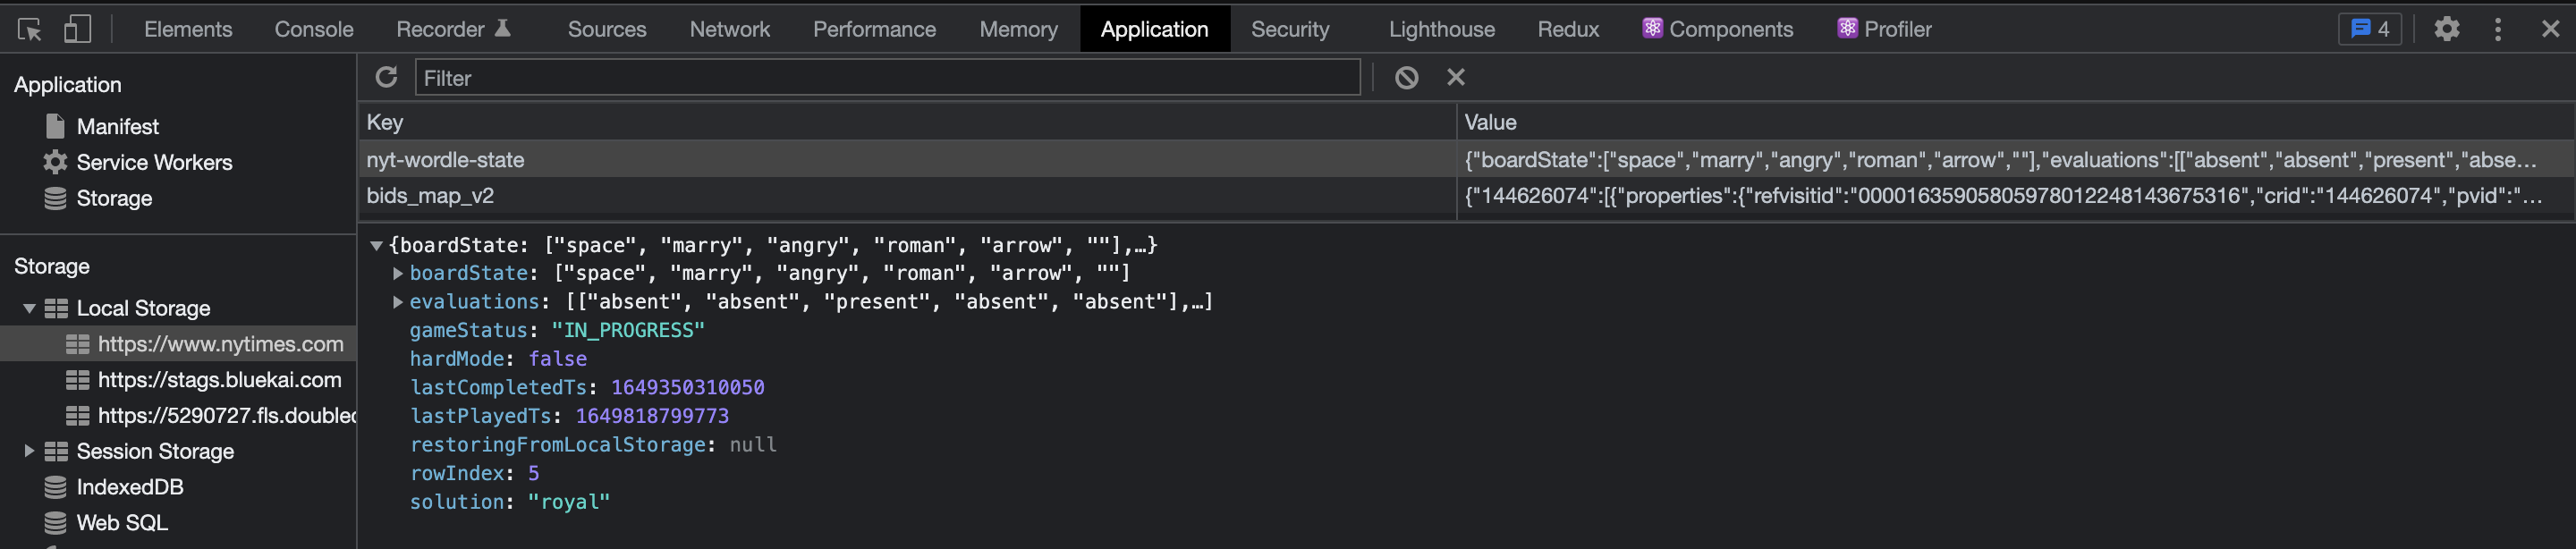
Finding the solution in the console
As another bonus feature, I thought it would be interesting to allow the player to customize the game by choosing the number of letters in a word, which would also determine the number of rows in the grid (simply the number of letters + 1). Thus I pass in the number of letters as a prop to the game component (my current version of the app allows users to play the game with 5-letter or 6-letter words). This allows me to easily scale the game to more options in the future (even my generated grid is based on this prop without having the number 5 hardcoded in).
Here’s an example of the 6-letter mode (it is much harder than playing 5-letter mode, by the way!):
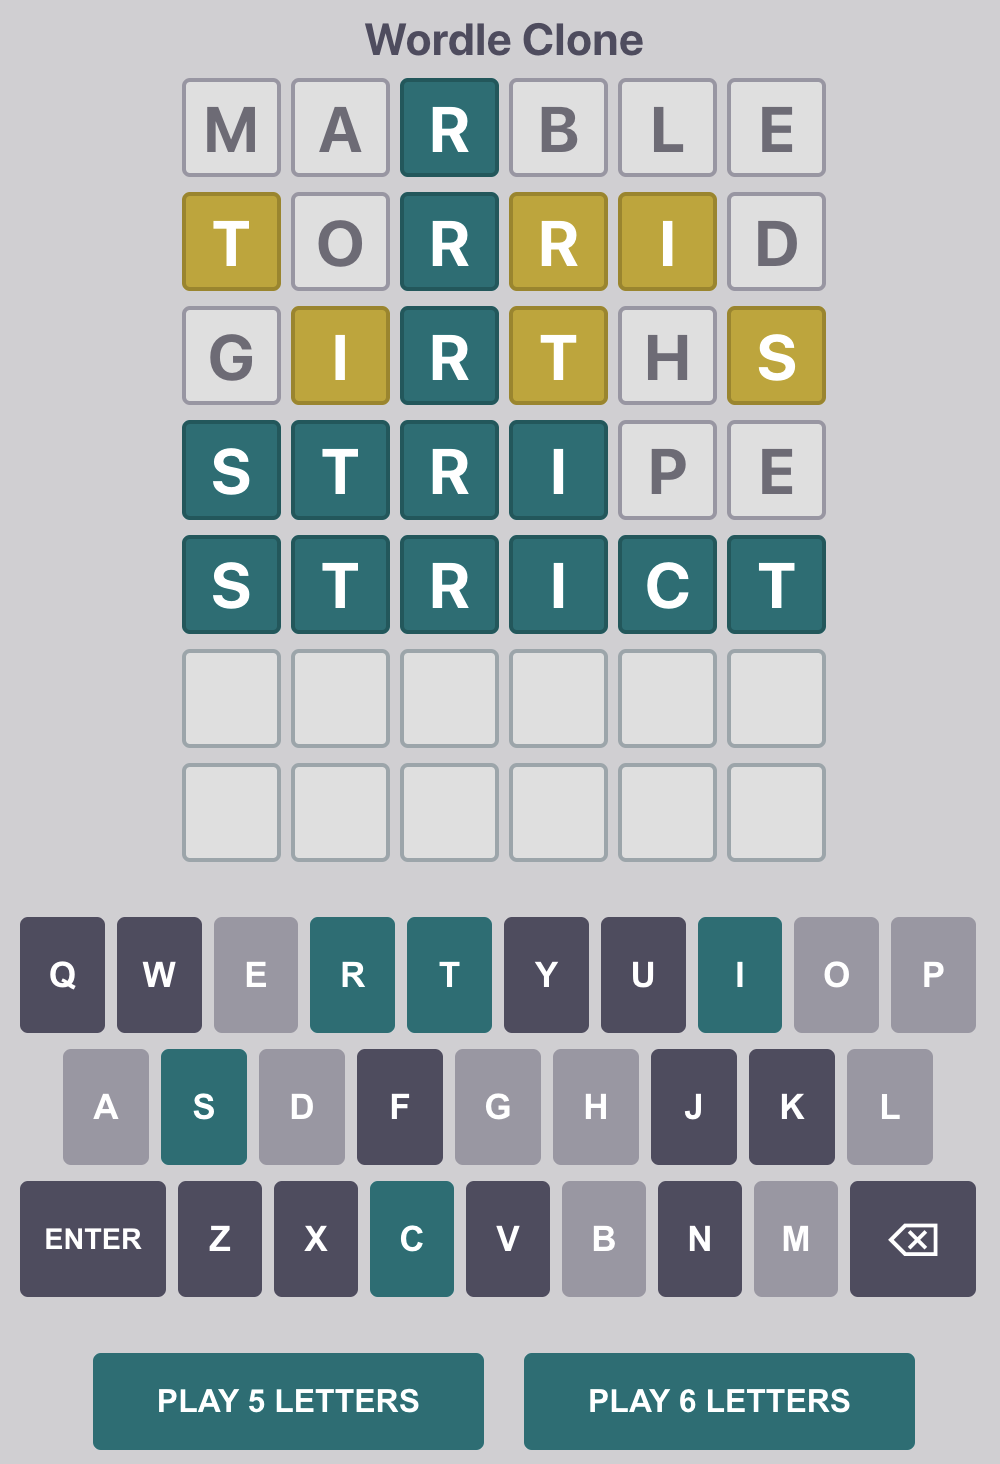
6-letter mode
To view the full code for this project, visit my GitHub repo.
Here’s a full demo of the game. Enjoy!